Preparations for Installing the Backend
The following preparations must be completed before beginning with installation of IZYTRONIQ:
Installing IIS in the Server Manager under “Roles and Features”
The following description is based on the English version of a Windows server. Images and sequences may vary depending on server version.
► Start the Server Manager and open the selection list by clicking
Add roles and features.
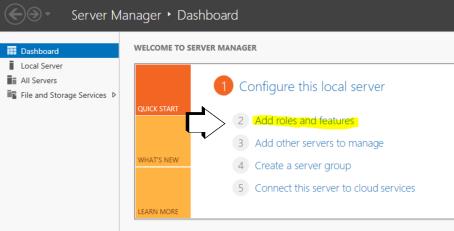
The required features are listed under
„System Requirements“. Install any missing roles and features.
Embedding an SSL Certificate
A valid certificate must be available on the server in order to be able to use the WebService and the SyncService.
This certificate provides for secure communication via https in order to ensure GDPR-compliant data exchange.
It’s advisable to obtain the certificate from an authorized source with a suitable duration of validity. A self-signed certificate can be used as an alternative. However, these are typically limited to one year and must be installed separately to the clients in the “Trusted Root Certification Authorities” memory location.
A description of where the certificate has to be embedded into the IIS (Internet Information Services) is included below.
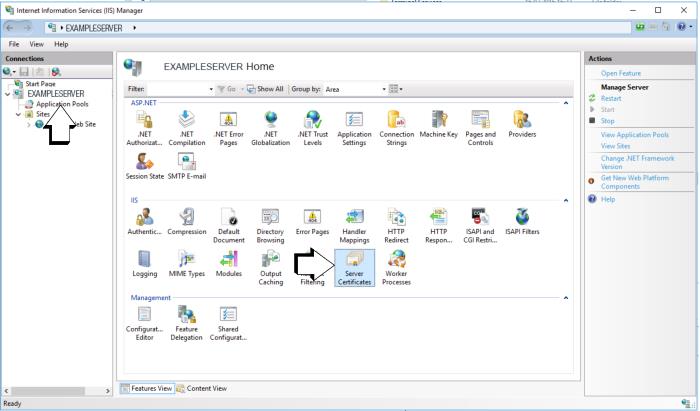
► Click Server Certificates.
► Afterwards, the desired certificate has to be loaded to IIS via the import function.
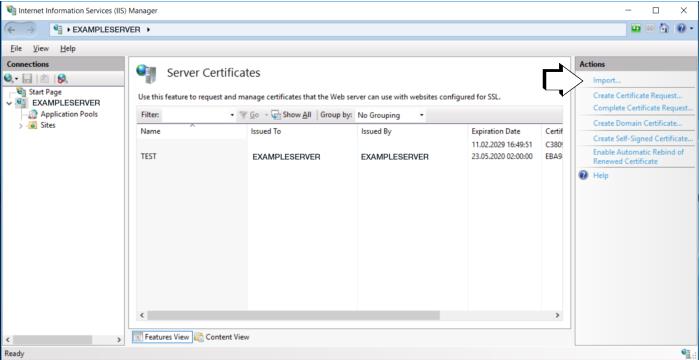
► Select “Personal” under certificate store.
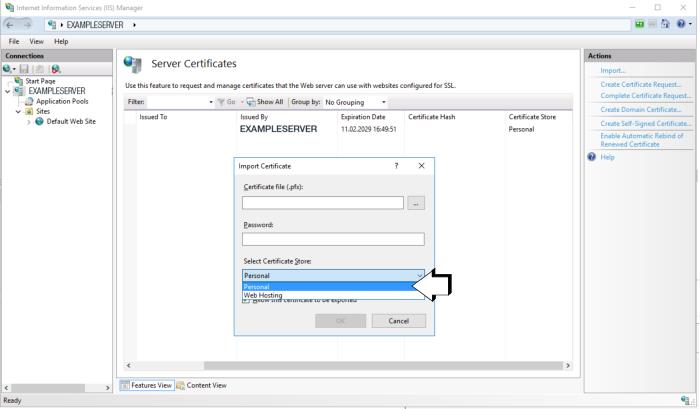
► The certificate’s fingerprint is entered to the respective configuration files (IZYTRONIQ.SyncSvc.exe and Web) in uppercase letters without blanks and without hidden special characters. It may be advisable to copy the certificate’s fingerprint into the editor and make a note of it, in order to avoid errors.
► Subsequently, the certificate also has to be entered to the bindings of the
default website so that communication can take place in the case of standard installation.
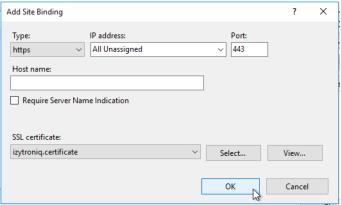
A new binding must be added via the “Add” function. A new window appears. It must be assured that “https” is selected under type and that “443” is selected as the port. The SSL certificate must then be selected which was previously imported into IIS. The “IP address” and “Host name” fields remain unchanged.
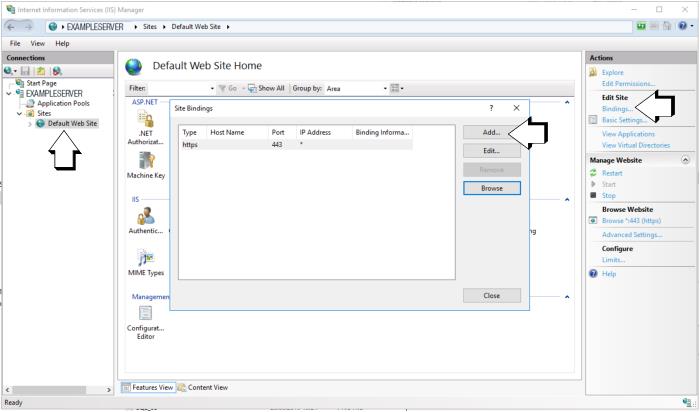
► Acknowledge your selections by clicking OK.


