The Tree View
The tree view shows all acquired test objects, customers and locations. These are displayed hierarchically as two tree structures, namely the electric tree (e-tree, left) and the location tree (right).
A closed node can be opened and an open node can be closed by selecting the node icons.
E-Tree
Customers and test objects are displayed here. Objects are always assigned to a customer.
There’s no provision for test objects which are not assigned to a customer.
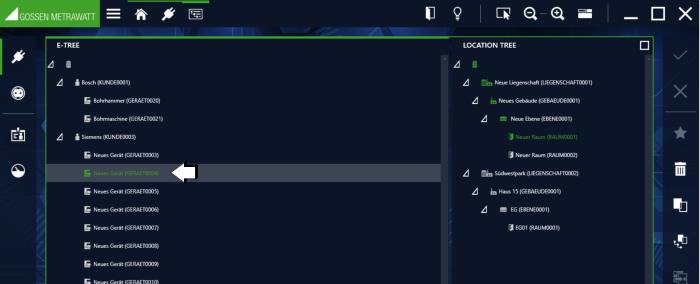
Selected Test Object in the E-Tree
Location Tree
Registered locations are displayed hierarchically here. Test objects can be assigned to these locations, although this is not mandatory. The location tree has 4 defined hierarchy levels: property, building, floor and room. Not all of the hierarchical levels need to be used.
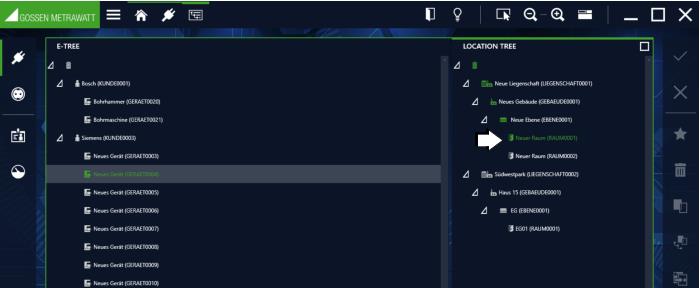
Selected Location in the Location Tree
Interaction Amongst the Tree Structures
A test object can (but doesn’t have to) have a link to exactly one object in the location tree.
On the other hand, an object in the location tree can have links to several test objects in the e-tree. If a location is marked in the location tree, all elements located at this location are highlighted in green in the e-tree.
If a test object is selected in the e-tree, its location assignment can be recognized by the fact that the associated location object is highlighted in green.
Tree Element Linking Logic
If an object is selected, the corresponding tree becomes the active tree. This tree is identified by means of a green outline around the tree window and by a more pronounced green bar on the top side, as described above. Only one object can be selected at a time in the active tree. This changes the color of the icon and the text for the object to green, and the corresponding line has a gray background.
The associated elements are identified in the other tree by changing the color of their icons and texts from white to green. The respective parent objects are identified only by the green color of their icons – the color of the text remains white.
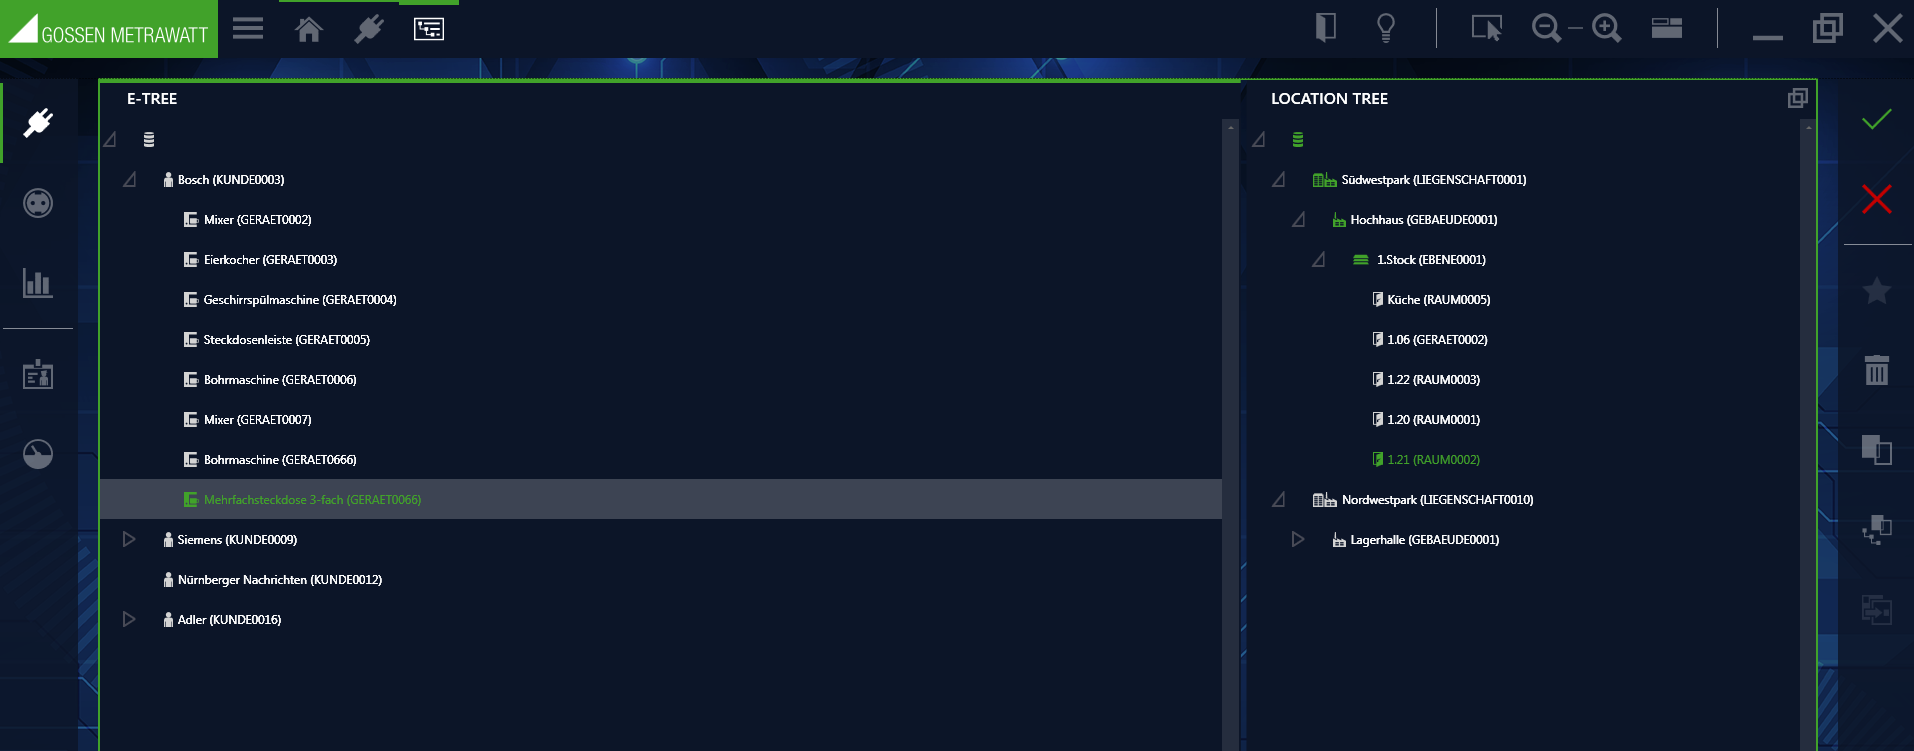
E-Tree Example: Multiple Outlet Assignment
The e-tree is active and the multiple 3-way outlet is selected. The icon and text are then green and have a gray bar in the background. The location tree reveals that this multiple outlet is located in room 1.21. The parent objects, Südwestpark, high-rise building, 1
st floor, are identified by the green color of their icons, so that even when the node is closed, you can see where the multiple outlet is located.
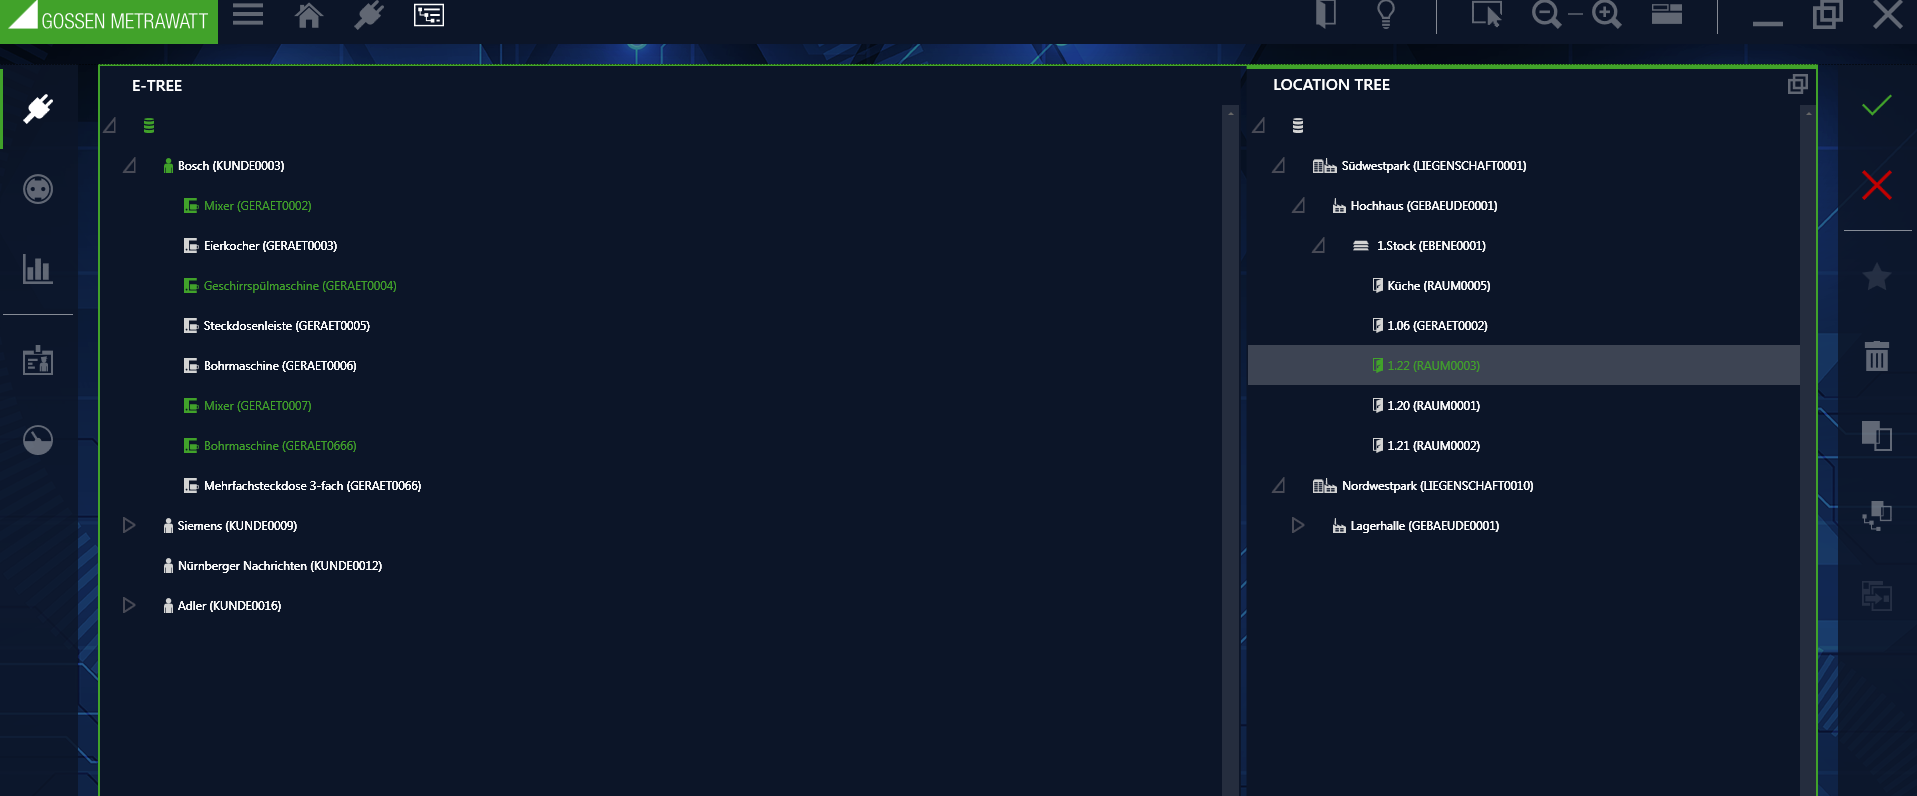
Location Tree Example: Objects in Room 1.22
The location tree is active, room 1.22 is selected. The icon and text are then green and have a gray bar in the background. The e-tree shows which objects are in this room.
Editing Trees
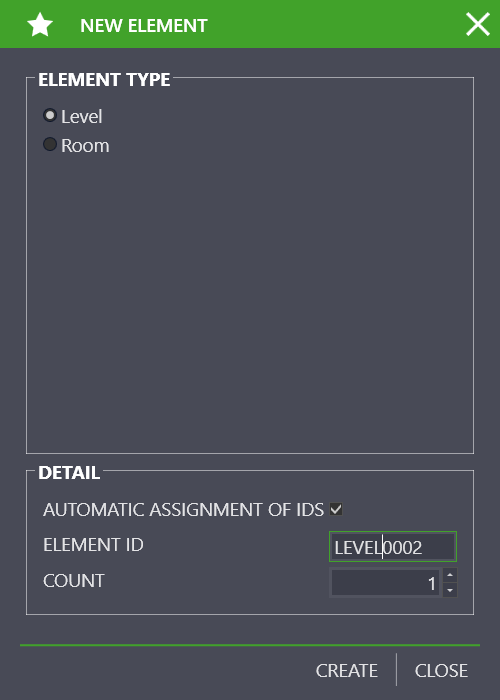
In order to create a new element, the object under which the new element will be created must already be selected. The selected object is then displayed with a gray bar in the background. After selecting

, the “New Element” popup appears, in which the selection of possible elements at the selected position in the tree is presented (e.g. if it’s in the “Buildings” hierarchy level in the location tree, “Levels” or “Rooms” can be created).
Hierarchy in the location tree for portable objects:
Hierarchy in the e-tree for portable objects:
After selecting the desired element type, an element ID and the number of elements to be created must then be specified. The element ID can also be created automatically by a rule defined in the settings, which is mandatory when creating several elements of the same type at the same time. After creating one or more elements, the newly created element (the first in case of multiple creation) is automatically selected and creation of a subordinate element is initiated. The process is not ended until the user explicitly closes the “New Element” popup (“Close” command). The newly created element or elements are identified with a + sign as long as they have not yet been saved.
Create a new element
Save changes

Cancel editing
Delete an element
Copy an element
Copy an element along with its sub-elements (always inserted below the selected element in the hierarchy)
Paste a copied element (always inserted below the selected element in the hierarchy)